
Contractors: 6 Steps to Create Work Orders That Get Jobs Done

The fastest reliable way to create work orders is to match the tool to your volume: a fillable PDF template if you’re doing a handful of jobs a week, a spreadsheet if you need sequential numbers and simple tracking, or a trades-focused app once you need dispatch, e-signatures, and a straight line to invoicing. Every method needs the same core fields. The sections below give you those fields, a copy-ready workflow, and template options you can start using today.
TL;DR:
- Using a simple app or spreadsheet becomes insufficient for managing multiple technicians and job sites, making automation of relationships and data entry critical.
- Core work order fields include sequential numbers, detailed scope, customer contact and site info, required materials, estimated hours, and signature approval, to prevent errors and disputes.
- Workflow steps like precise scope documentation, clear scheduling, authorization, dispatch, and closeout are essential to avoid missed details and ensure smooth project completion.
- Templates should be straightforward, with auto-numbering, picklists, and formulas in spreadsheets or app integrations to reduce manual errors and streamline operations.
- Small companies benefit from dedicated work order software like Forge, which consolidates quotes, jobs, and invoices to eliminate duplicate data entry and improve organization.
Table of Contents
- Fast options to create work orders: printable template, Excel, or a simple field app
- Essential fields every work order must include
- Step-by-step: fill out, authorise, dispatch and close a work order
- Practical templates and examples you can copy or adapt
- When simple business software actually helps
- Forge: a simple option to create and manage work orders
- Sources
- FAQ
Fast options to create work orders: printable template, Excel, or a simple field app
Your crew size and job volume decide which method makes sense. Here’s how the three main options stack up.
- Printable or fillable PDF: Best for a solo operator doing a few jobs a week. Quick to fill, works without WiFi at the job site, and easy to hand a customer. The downside: you’re stuck retyping details into a spreadsheet or invoice later, and paper gets lost in a truck.
- Excel or Google Sheets: Good for a two or three-person crew that wants sequential work order numbers and basic formulas for totals. Cheap and flexible, but syncing between office and field is clumsy, and typing into a spreadsheet on a phone screen is painful.
- A simple business app: Makes sense once you’re scheduling multiple techs a day. You get dispatch, photo capture, e-signatures, and a direct link between quotes, work orders, and invoices. The trade-off is a monthly cost and a short learning curve for the crew.
A landscaping company with two trucks running five jobs a day usually outgrows Excel within a season. A solo electrician doing three service calls a week rarely needs more than a printable template.
Essential fields every work order must include
A work order is only useful if a technician who has never seen the job can read it and know exactly what to do. Miss a field and you get callbacks, disputes, or a tech standing at the wrong address. Indeed Canada’s guide to writing work orders lists the core fields that prevent field errors, and they hold up across HVAC, plumbing, electrical, and renovation work alike.
Here’s what belongs on every work order:
- Sequential work order number and both the date created and the date scheduled.
- Customer contact info separate from the job site address (a property manager’s billing address is often different from the unit being serviced).
- Assigned technician or crew, plus the promised time window and job priority.
- Scope of work written so a tech can act on it cold, with the specific asset and expected outcome named.
- Materials and parts needed, with part numbers and estimated quantities.
- Estimated labour hours and rate, along with payment terms and any deposit instructions. Deposits commonly run 10 to 50% for jobs requiring upfront parts purchases, with milestone payments on bigger projects.
- Access instructions and safety or permit notes (gate codes, pets, confined space warnings).
- Photo requirements for before-and-after documentation, which reduces disputes and gives you chargeback proof if a customer questions the bill.
- Signature or approval lines for both authorization to start and sign-off on completion.
If you run preventive maintenance or inspection work, add a short variant section for recurring checklist items. A PM visit doesn’t need the same scope-writing detail as an emergency repair, but it still needs a date, an asset ID, and a sign-off line.
Step-by-step: fill out, authorise, dispatch and close a work order
Follow this sequence and you’ll rarely miss a field or lose track of a job between the phone call and the invoice.
- Capture the request exactly. Write down what the customer actually said, not your guess at what they mean. If a customer says “the furnace is making noise,” ask what kind of noise and when it started before you write the scope.
- Write the scope so a tech can read it cold. Instead of “fix furnace,” write “replace condenser fan motor, unit is a 2018 Lennox in the backyard, customer reports grinding noise on startup.” That level of detail comes straight from Indeed’s guidance on writing scopes, and it’s the single biggest thing separating a smooth job from a confused callback. List the parts and tools needed underneath it.
- Set the schedule and assign the tech. Note access details, any safety concerns, and the promised time window.
- Get authorization. A signature or e-signature on the work order confirms the customer approved the scope and price. Note your rule for change orders here too. If the tech finds extra damage on site, that’s a new signature, not a silent scope creep.
- Dispatch the package. The tech’s copy should have everything: scope, parts list, access notes, and the customer’s contact number. Nothing worse than a tech standing at a locked gate with no way to call anyone.
- Close it out. Record actual hours and parts used, attach photos, get a completion signature, and convert the work order straight into an invoice. This closeout step is what turns the approved estimate into the basis for your final invoice, and it’s also your best defence if a customer disputes the bill later.
Practical templates and examples you can copy or adapt
A one-page printable template needs a header (company info, WO number, date), a job details block (customer, site address, tech assigned), a scope box, a materials table, and a signature area at the bottom. Keep it to one page so it fits on a clipboard.
An Excel or Google Sheets version should do more of the heavy lifting:
- Auto-generate sequential WO numbers with a simple formula so you never duplicate one.
- Use picklists for technician names and common parts to cut down on typos.
- Build in formulas for totals (labour hours times rate, plus parts) so nobody’s doing math by hand.
- Keep one master file with version control so the crew isn’t working from three different copies with different fields.
A mobile form, whether it’s a PDF app or a dedicated platform, should prioritize a short checklist over long text fields, since nobody wants to type paragraphs on a phone. Photo capture and an e-signature field matter more on a small screen than a big scope box. Store whatever template you choose in one shared folder or app so the whole team always pulls the current version. Contractable’s guide on writing work order templates recommends testing any new template with a real job before rolling it out to the whole crew.
When simple business software actually helps
Templates work fine at low volume. The friction shows up once you’re juggling multiple techs, multiple job sites, and a customer calling to ask “where’s my invoice.” That’s usually the point where a trades-focused platform starts paying for itself instead of adding overhead.
The operational gain isn’t fancier paperwork. It’s fewer places for information to get lost. A single system holding customers, quotes, and work orders means the tech’s assigned job pulls the customer’s address and contact info automatically, instead of someone retyping it. Auto-sequenced work order numbers mean nobody’s guessing whether WO 214 already got used. E-signatures and photo attachments live with the job record instead of scattered across text messages.
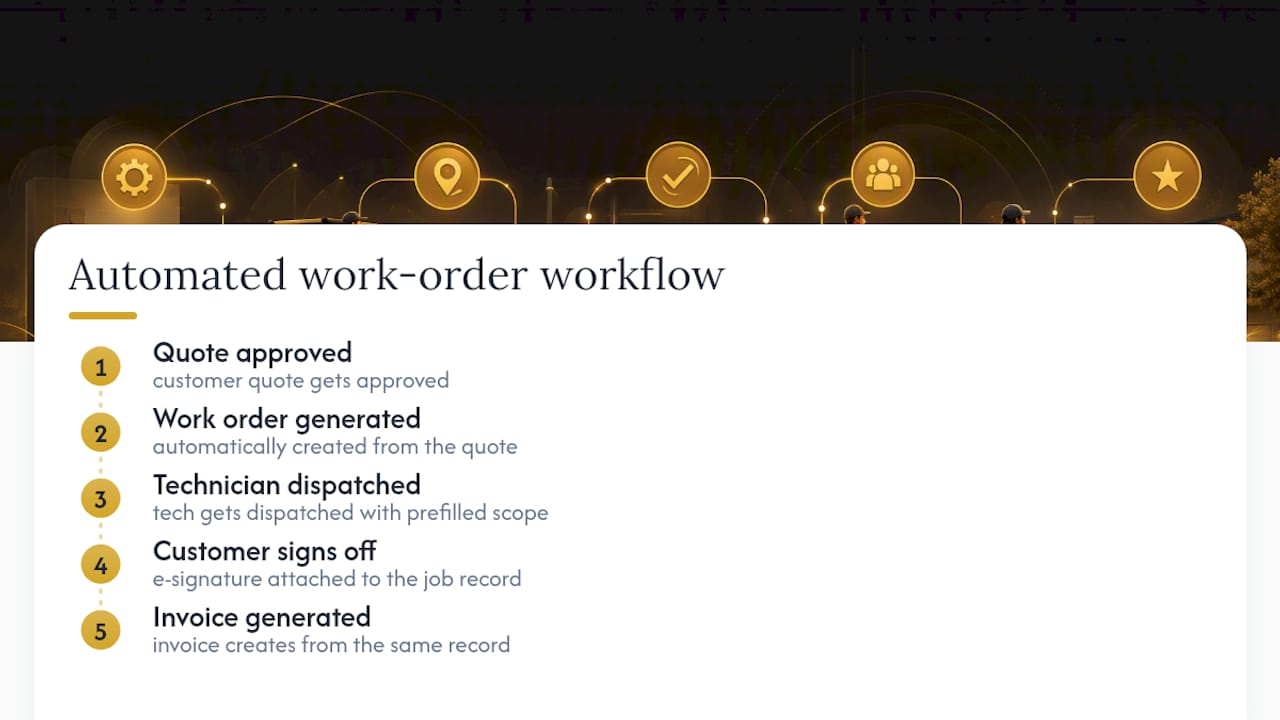
A typical workflow looks like this: a quote gets approved, a work order generates from it automatically, a tech gets dispatched with the scope already filled in, the customer signs off on completion, and an invoice generates from that same record without anyone retyping a line item.
Pro Tip: Don’t roll a new system out to your whole crew at once. Pilot it with one tech or one crew for two weeks, work out the kinks in your templates, then bring everyone else on once it’s running smoothly.
Forge: a simple option to create and manage work orders
If you’re already comfortable with a template but tired of retyping the same job details three times between the quote, the work order, and the invoice, that’s exactly the gap Forge is built to close. Forge is business software built specifically for small trades businesses, and it keeps customers, quotes, work orders, invoices, and follow-ups in one place so you can see what needs attention without digging through texts and spreadsheets.
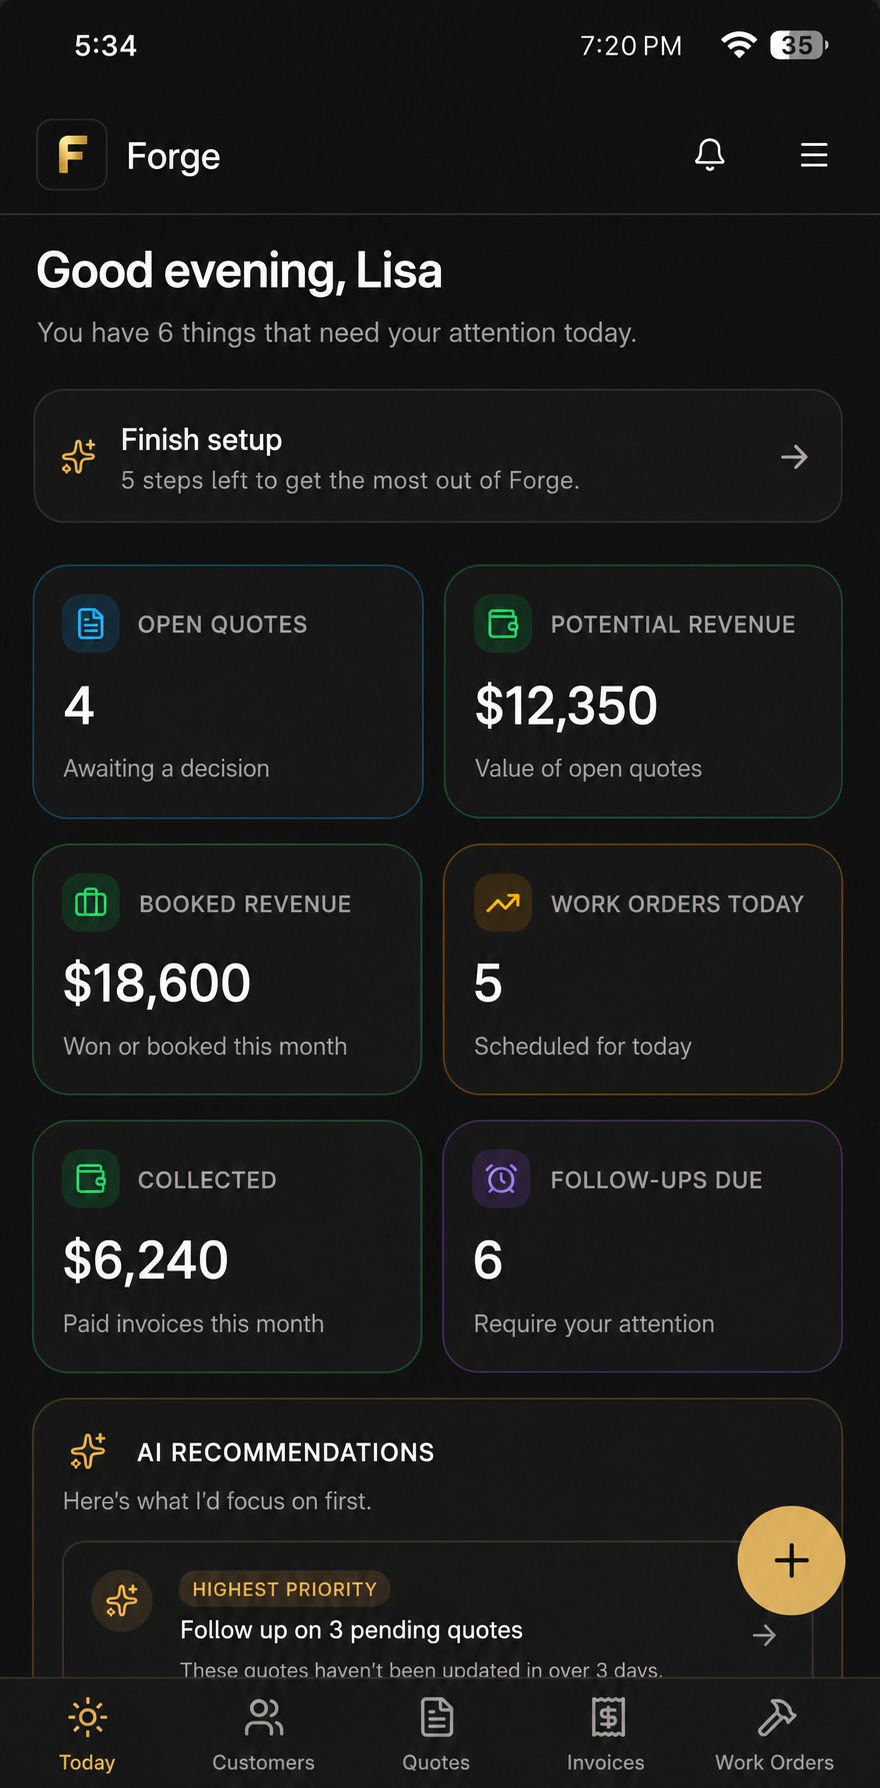
Picture a plumbing job that starts as an approved quote on a Tuesday morning. In Forge, that quote becomes a work order with the customer’s info and job site address already filled in. Your tech gets dispatched, finishes the job, and gets a signature right on the spot. That signed work order turns into an invoice without anyone touching a keyboard again. No re-entering the customer’s address a third time, no digging through a truck for a paper copy.
Forge doesn’t replace your accounting software. It’s the layer that keeps your day-to-day jobs organized so nothing slips between the quote and the invoice. If that sounds like the gap in your current setup, you can see how Forge handles work orders and try it for yourself.
Sources
- How to write a work order (Indeed Canada)
- How to fill out a work order form: From scope to invoice (LegalClarity)
- Work order template: How to write one (Contractable)
FAQ
How do you create a simple work order?
Start with a one-page template that has a header, customer and job site info, a clear scope of work, a materials list, and a signature line. For low volume, a printable PDF covers everything you need without any software.
What is an example of a work order?
A typical work order for HVAC work would read something like: “WO #1042, scheduled March 12, replace condenser fan motor on 2018 Lennox unit, customer reports grinding noise on startup, parts needed: fan motor and capacitor, tech assigned: Dave R., customer signature required on completion.”
How do you create work orders in Excel or Google Sheets?
Set up columns for WO number, date, customer, job site, scope, parts, and labour hours, then use a simple formula to auto-generate sequential numbers and calculate totals. Picklists for technicians and common parts help cut down on typing errors.
What fields does a work order management software need to have?
At minimum, look for customer and job details, technician assignment, e-signature capture, photo attachments, and a direct link to invoicing so you’re not retyping job details across separate systems, which is the approach Forge takes for small trades businesses.
How does a work order connect to an invoice?
The work order records the approved scope, parts used, and actual labour hours, and that same record becomes the basis for the final invoice once the job is signed off as complete.